Delta Tips: Delta V6.0 - New Contour Level Control
NMDT_0078
In Delta V6.0, it is possible to adjust contour levels of 2D data by using the new Contour panel in the nD Processor window. You can use the Contour panel in the same way as you would use the Level Tool. This new panel allows you to input contour level values. And also, it is possible to adjust contour levels by using the Contour Slide function with the Contour button.
★ For the details of the Level Tool, refer to the Delta Tips issue titled Level Tool (⇒ NMDT_0077).
How to use the Contour panel in the nD Processor window :
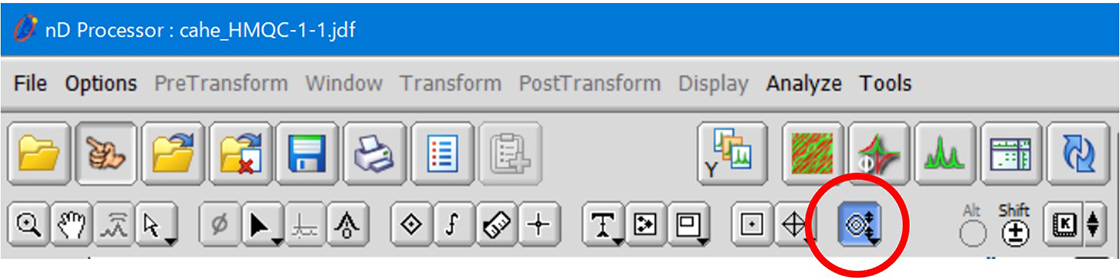
① Click the Contour button in the nD Processor window to open the Contour panel.
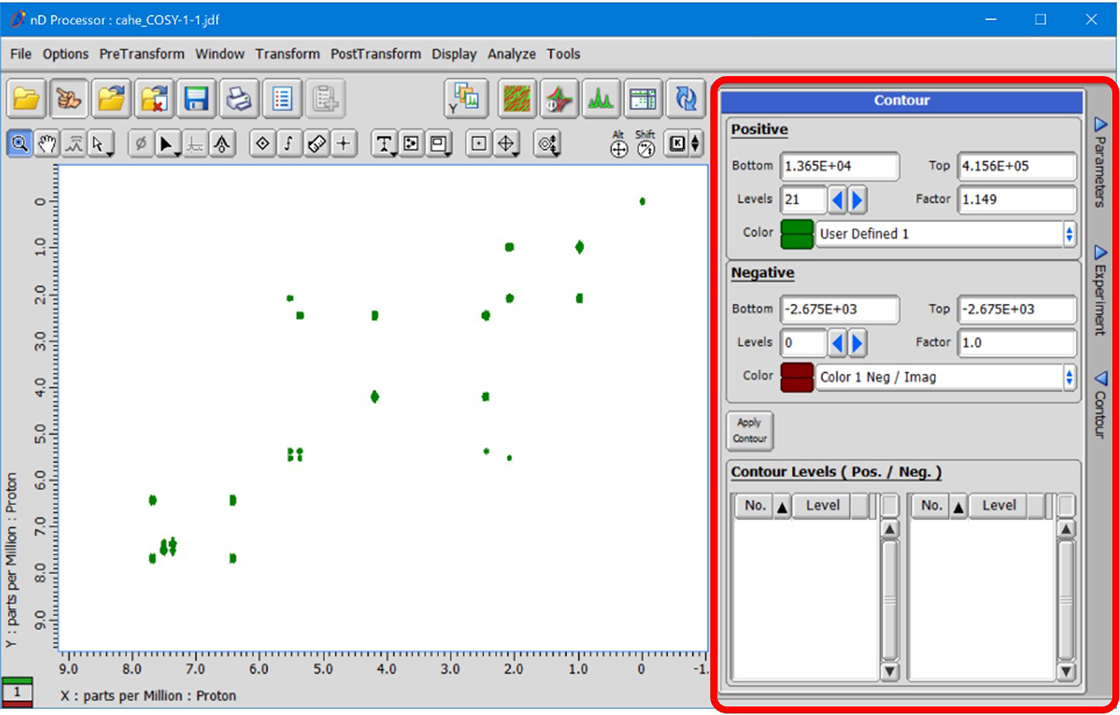
② Click the Apply Contour button to display the current Contour Levels of the spectrum displayed.
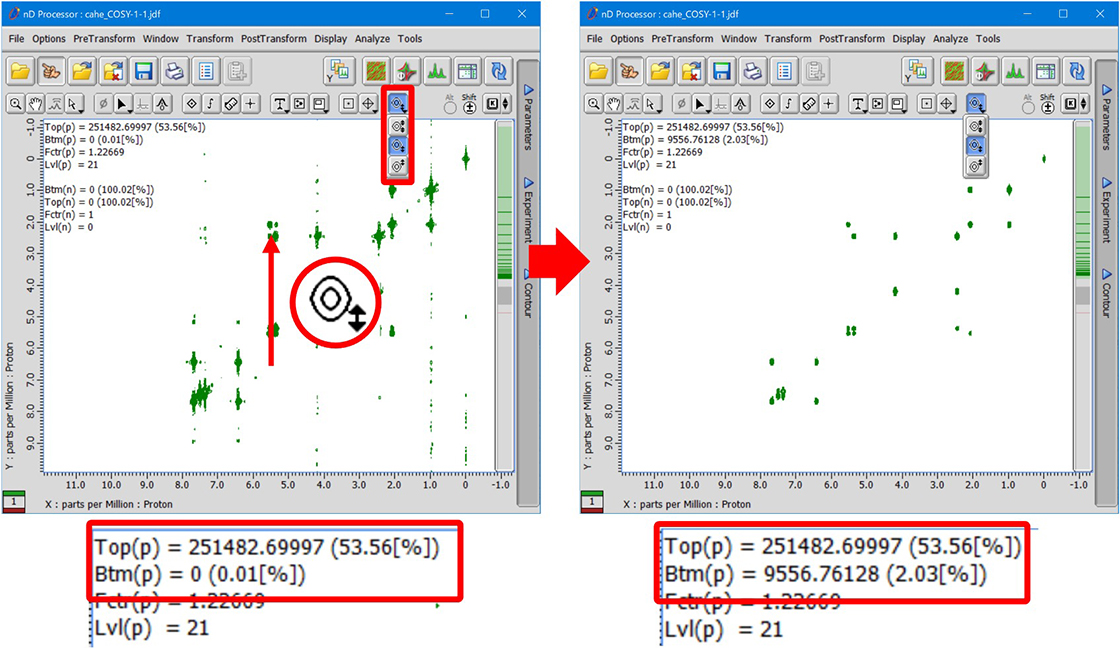
③ Adjust the Bottom and Top contour levels.
In the example bellow, we will change the Bottom level from 5.0E+02 to 1.0E+03. Input the value and click the Apply Contour button to apply the new setting to the data.

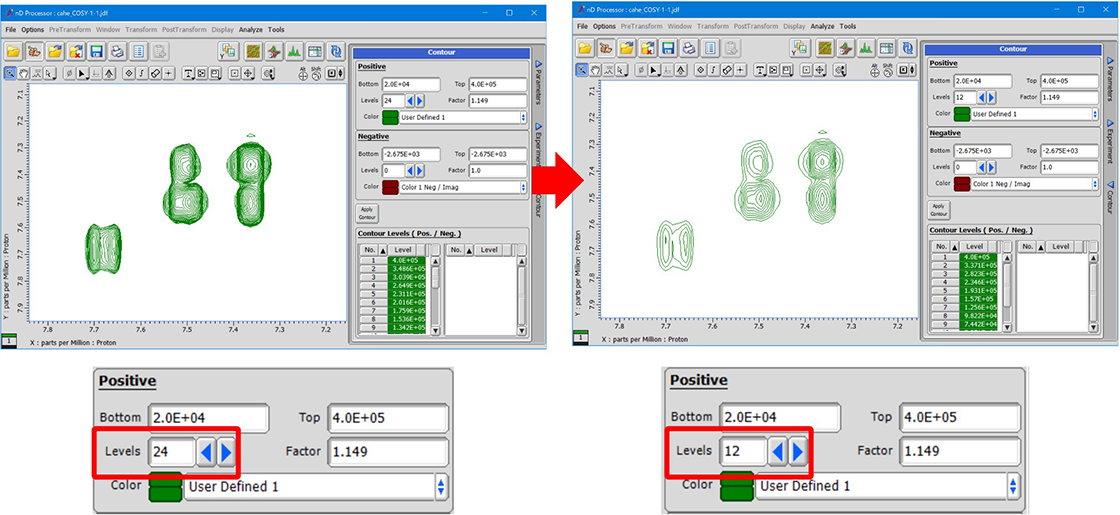
④ Set the number of contour levels via the Levels input box.
The Levels input box has the same function as the preset buttons of the Level Tool. In the example bellow, we will change the number of Levels from 24 to 12. Input the number and click the Apply Contour button to apply the new setting to the data.
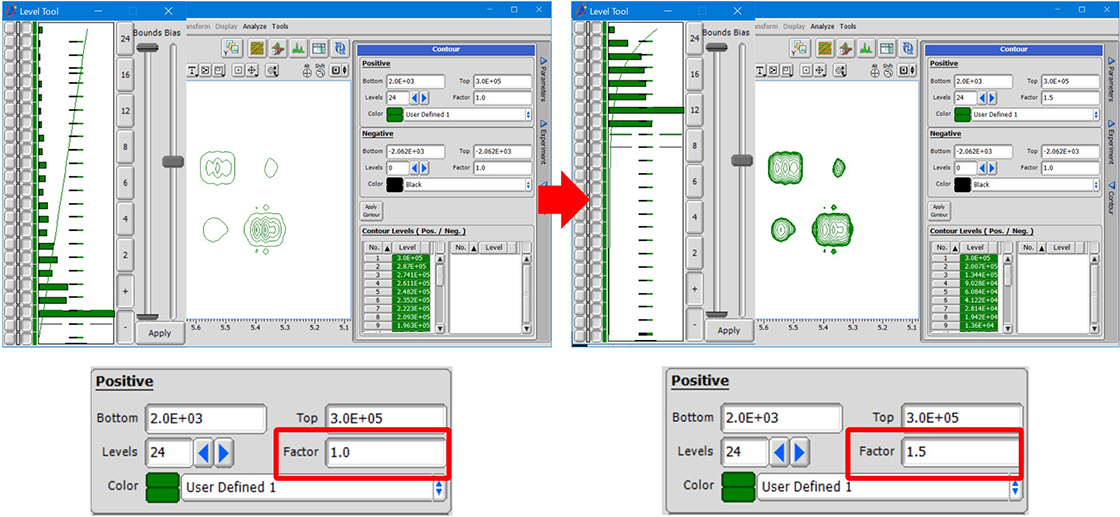
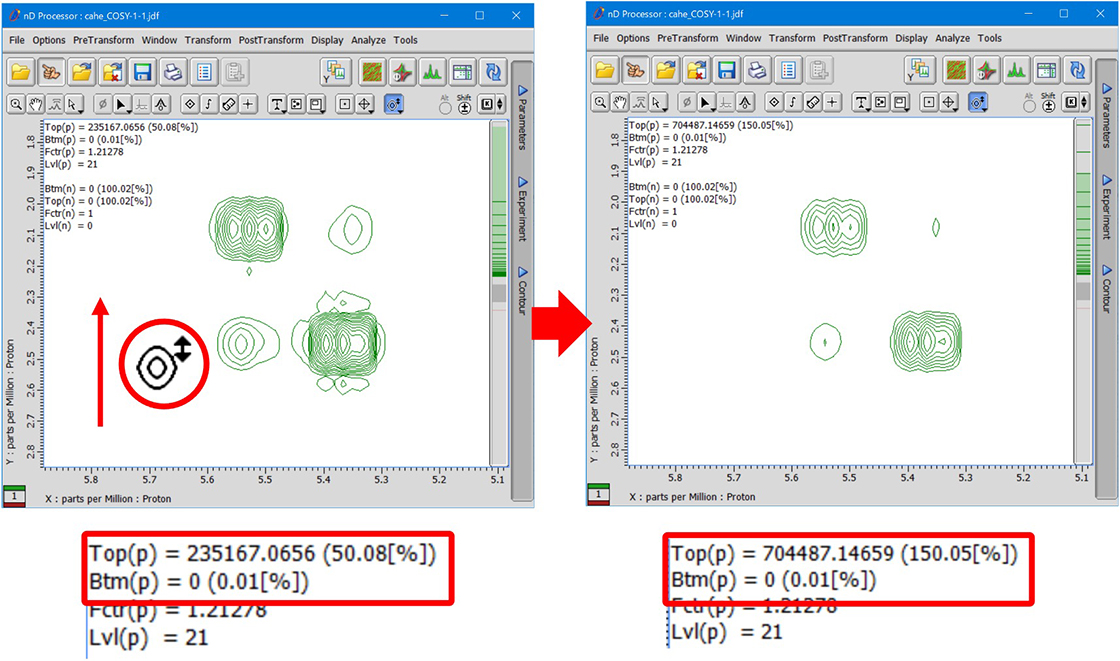
⑤ Adjust the value in the Factor input box to set the bias of contour plot.
The value of Factor has the same function as the Bias slider of the Level Tool window. In the example bellow, we will change the value of Factor from 1.0 to 1.5. Input the number and click the Apply Contour button to apply the new setting to the data.
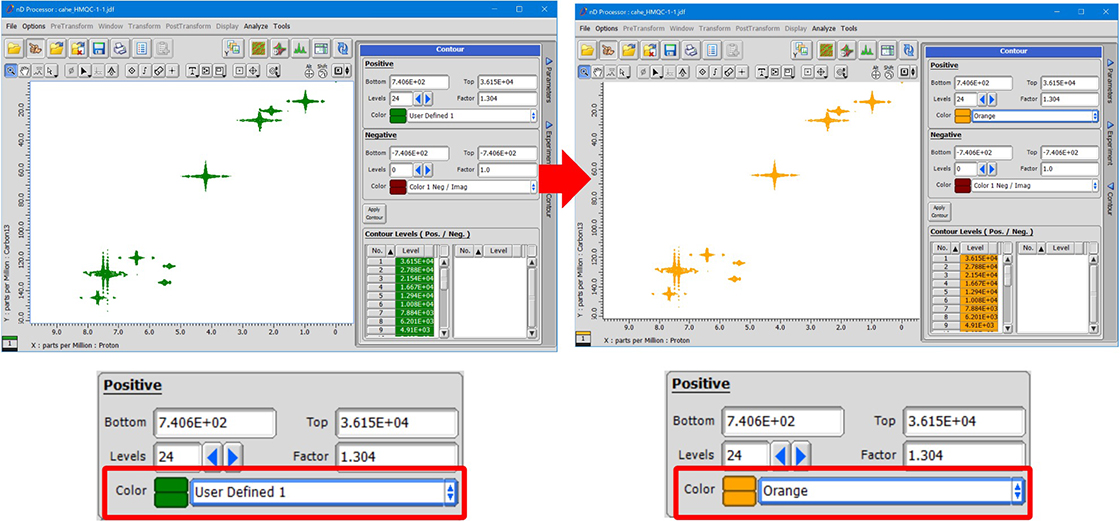
⑥ Set the colour of contours in the Color box. In the example bellow, we will change the colour of positive contours from green to orange. Change color in the Color box from User Defined 1 to Orange and click the Apply Contour button to apply the new setting to the data.
★ The Contour panel is linked to the Level Tool.
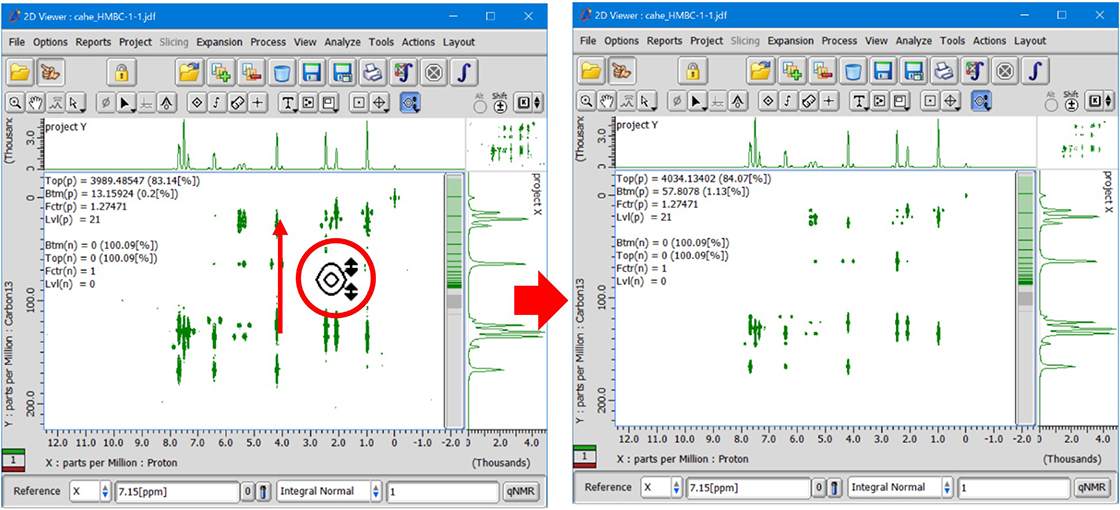
How to use the Contour Slide button :
① Click the Contour button in the pointer bar. Note that the cursor has changed into the Contour cursor.
② Drag and drop the Contour cursor on a 2D spectrum to adjust contours.
③ Click and hold the Contour button to show the Contour button list. In the example bellow, we will select the lowest contour button. Drag and drop the Contour cursor on a 2D spectrum to adjust the Bottom level.
④ In the example bellow, we will select the highest contour button. Drag and drop the Contour cursor on a 2D spectrum to adjust the Top level.
- Please see the PDF file for the additional information.
Another window opens when you click. 
PDF 2.5MB
SEARCH APPLICATIONS
Related Products
Are you a medical professional or personnel engaged in medical care?
No
Please be reminded that these pages are not intended to provide the general public with information about the products.